Showing posts with label sewing. Show all posts

Mar 27, 2018

Progress!

On March 24, I finally finished my January UFO project!  I didn't want to rush my work just to meet a deadline that was sort of artificial in the first place.  In January, I completed all of the straight line quilting with the walking foot.  Then in the beginning of March, I completed the free motion machine quilting. I used different motifs in the various areas.  This past Saturday, I added the binding and the hanging sleeve.  I am quite pleased with the project, and it only took a decade or two from start to finish!

I am in the midst of a major decluttering/reorganizing project in my bedroom.  My bedroom is also my craft room.  This project has been ongoing for months, but became more accelerated at the end of February when I bought my new friend Sergio home.


Sergio is a new Viking Husqvarna serger.  I have resisted buying a serger for quite some time, but I do so much garment sewing that it really makes sense to have one.  Anyway, I want to set it up on a little table so I can leave it up most of the time and move back and forth between sewing and serging without having to switch out the machines on the same table.  To be able to do this I need to declutter and rearrange the room to make room for a table.  I might try to put the serger on top of a lovely cabinet I bought that houses an antique treadle sewing machine.  I have the new owner classes for the machine in early April, I just can't decide if I will try to figure it out myself before that.

I also finished my Easter (2017) dress.  I started it for last Easter.  I redrew the neckline to match some embroidery I was using at the neckline, with no thought to the fact my neck still needed to fit the neckline, which of course it didn't.  I threw the dress aside, and then it turned out we stayed home last Easter anyway, because my husband Bob was not up to going anywhere.  I resurrected the dress recently.  I recut the neckline, chopping off the embroidery.  I redid the embroidery once I had a neckline that fit well.  I used bias binding in place of the ruined facings.  I definitely needed a refresher on order of assembly: for some reason I left installing the zipper until last, and that was not a good idea at all!  Since my return to sewing, my husband had been my helper to mark my hems for me.  For this dress I tried a new gadget I bought that one can use to shoot chalk along a line around the level of your dress where the hem should go.  It worked like a charm on the front, I think getting the markings on the back will take some practice.

Yesterday I made a t-shirt!  I used my old tried and true pattern and the remainder of a big piece of grey knit I bought years ago at the Goodville Fabric Outlet (now Zincks).  I wanted to try out the heat transfer vinyl and my Cricut machine to make a graphic T.  

I added one of the little Maggie Made This labels I had made.  I used thread that matched my vinyl.  I really enjoyed making this!


Mar 13, 2016

Underpinnings!

When I was growing up, my mom made all my clothes.  I remember thinking 'next thing you know she will be making my undies' , like that would be the last straw.  She never did.  But now I do!  Back in the day when a perfectly acceptable 3 pack of panties could be had for a song in any big box store, I never would have thought of making them.  But nowadays, I have to buy online, and although they are expensive, they are not high quality.

So I traced a pair of decent fitting ready to wear, and my undies sewing adventures began.  There have been a number of prototypes made to work out how long the elastics should be cut, and trying different fabrics.  I saw a number of people online talk about using old tshirts as fabric, but I found that the fabric from the old tshirts in my house did not have very good recovery, so the garments stretched out and did not snap back!  I have had success with new yardage of cotton jersey.

Then I saw a number of people online talking about sewing their own bras! Finding affordable bras has always been an issue, plus straps were never really long enough.  So I signed up for Beverly Johnson's bra making class on Craftsy.  Amazing! First of all, she is a great teacher.  I just made my fourth edition, and I still play the class over and sew along with her.  Oh the fit!  Even with underwires they are the most comfortable bras I have worn.

I made my first 3 bras from kits I bought from Beverly's store, Bra Maker's Supply.  The kits are very nice, although because I am large sized and need longer straps, I have a hard time getting a bra from the duoplex supplied with the kit (that is the fabric for the cups and frame.)  I end up piecing the straps every time.  Because of this, I have covered straps with lace, as shown above.  The last bra I made was from a kit I bought from Bravobella.  The kit was pretty, but I feel like the tricot they supply for the cups and frame is not firm enough.  I used it doubled or lined it with some cup lining I bought separately.  I feel like it is still too drapey.  I made a bra that looks pretty and functions ok, but it somehow feels too delicate, and the straps bunch up and dig into my shoulders.

I will not be posting photos of my finished granny panties.  I might photograph finished bras if I can figure out a stand in model for me.  I have no dress form, so I will have to get imaginative!

Dec 15, 2015

The Pillow Project

Some time ago, I think it was probably on Easter Sunday, one of my favorite relatives commissioned me to make some pillows for him.  His parents had recently passed, and he had boxes and boxes of his father's tie collection.  He wanted me to make pillows for him to give to his siblings and nephew.

I got a slow start, and then the request came in from my cousin for the quilt and bear for her new grandbaby.  As a result it was probably November before I finished the prototype pillow.

I decided that I wanted to include as many assorted ties as I could, and that I would try not to repeat any tie twice on any pillow.  To accomplish this, I pieced the pillows in pairs so I could keep track of what I had added to each.  For the initial pillows, I had to deconstruct ties as I went, so about 40 ties to make that first pillow.  After the first pair, I added 10 new ties to the mix, so that each pair had some ties that were different, plus a subset that were the same.

I cut strips from the deconstructed ties, and pieced them onto a muslin foundation, which I had cut to about 10 inches square.  Once I had the 4 squares for each pillow pieced, I trimmed them to 9.75 inches square for a finished pillow size of 18 inches.

I used blue wool suiting fabric found at the Goodville PA Fabric Outlet as the backing, and to cover the cording.  The backs close with nice blue coat type buttons.  I embroidered some labels, and those are hidden under the button placket.

This is a care label, the other labels included the personal information for the family , so I won't share it here.

Here's the whole collection:

I am super happy with how they turned out!

Nov 30, 2015

Misty Sewalong

Thanks you to Alicia over at Pandora Sews for hosting the Misty Jeans sewalong!  I really liked the pattern, by StyleArc when Alicia posted about the sewalong, and they had extended the size range so my measurements were included! So I bought the pattern and planned to sew along.

I made a muslin first of the size 38 with no alterations. This size was seemed like it might be big in the waist, but I wanted to be sure I could get it on over my hips.   I figured I could make the elastic the correct size for my waist and I would be ok. When I got to the trying on stage, they were really big in the leg, so I took out a lot of volume, on the outside leg seams only and only below where the pocket seams were.

Here are photos of me in the practice pair, which I made in $2/yd stretch denim I got from the FabricMart brick and mortar.


I am not dissatisfied with how these look, but I am forever having to pull them up.  

So then when I was going to make my "real" pair, I slashed the pattern and took 0.75 inch out of each pattern piece.  when I tried on this pair, the legs fit much better, but they seemed a  little tight in the torso.  This pair also needed pulling up constantly.  When I took photos of that pair, which I am reluctant to share, they seemed to somehow be simultaneously baggy and tight.  The back bagged, but it also pulled in the crotch.  I think I need to do a full tummy adjustment, because the tummy area is pulling too much of the pants fabric forward, making the back crotch too short.

OK, I will post the back view photos, but the front looks like a giant spotlight being targeted on my gut, so I will not post that one!


I really want to get this pattern to work out, I feel like these could be a great go to pant for my lifestyle if I can work out the fit issues.  I am currently watching the Craftsy class Plus Size Pant Fitting, and will apply what I learn there to this pattern before I try again.

Here are some closeups so you can see my topstitching, etc.  I could not see the topstitching very much on my first pair, so on my second, I used a stitch on  my machine that basically lays 2 straight stitches side by side.  This made the topstitching much more prominent.

This is the pocket of my second pair:


Front detail of the second pair:


Oct 7, 2015

WIP Wednesday - Oct 7 2015 - Necktie Pillows

I have a commission to make some pillows from a rather extensive collection of really nice ties. I've sewn with ties before, so I know that they are a pain to sew with, being cut on the bias. So I decided that I should string piece these ties onto a muslin background for stability. I also knew that I did not want to repeat any ties within any given pillow, so to accomplish that I am only working on one or two at a time.

I started by opening up all of the ties and pulling out the facings and interfacings.  I ironed the ties in batches just before I cut them.  I have so far only processed about 50 ties.  I will add some more newly processed ties as I move on to more of the pillows.  Then I rotary cut some strips of various widths, mostly between 1.5 and 3 inches.


Then I sewed the strips onto the muslin background, which I had cut into 9.75 inch squares.  


After covering the foundation with the ties, I trimmed the blocks square and then sewed 4 smaller blocks together.  I am really quite happy with these!


Next I need to cover some cording for the edges and sew the pillows together.  I am backing these with wool suiting in a dark navy.

Linking up with Freshly Pieced for WIP Wednesday.

Sep 15, 2015

Teddy Bears

My favorite cousin asked me to make a teddy bear from some sentimental clothing items for her soon to be grandchild.  I had never made a teddy bear, but I am not able to tell this cousin "no" so I went for it.

I found a pattern I liked  thanks to the site How Joyful.  But I wanted to make a practice bear before touching that sentimental clothing.  So I decided to make a practice bear for my grand niece Nessa.
I found a piece of red stretch velour that I had left over from a robe I  made for my mom.  To avoid having it look too Christmas themed, I embroidered some flowers on the fabric in purple and white.

The pattern instructions said this is not for beginners, and I agree with that.  There were some tricky parts that did not go together quite as I expected, but I made it work.  I love the way it turned out!


So then I got brave and was ready to cut out the commissioned bear.  By this time we knew that the baby was a girl, so we could concentrate on the  girly fabrics.  I cut out pieces to make a patchwork sort of bear.

This version went together much easier than the first, I am so glad I practiced!


Aug 26, 2015

Fall Wardrobe Plan

Every quarter on the Artisan Square forums, there is a capsule wardrobe sewalong called the 6PAC.  (I recently found out that stand for Six piece Autumn Collection!  Not sure what it means in the other seasons.)  Anyway, I have some special commissioned sewing I am working on, but then I plan to make a 6PAC.

The centerpiece of my little capsule will be my Mindy Cardigan that I am knitting,  It is a pattern by Julia Farwell-Clay.  I started it many moons ago, but recently picked it up again with gusto, in hopes of finishing it before the weather turns cold.  Here is a photo of the back in progress.

It sort of reminds me of Marsala, one of the Pantone colors of the moment. This color does not have the brown undertones that Marsala seems to have, but this means it goes better with my current black/grey wardrobe.

So along with the sweater I plan to sew two pairs of pants, probably using Butterick 5222 like I did for my brown capris.  I have stretch twill in both navy blue and a dark charcoal.  Then I will try a new top pattern I have drafted in Pattern Master Boutique, based on my TNT tshirt pattern, but with a bit of a draped neckline.  I have a light blue cotton jersey and a white jersey with black and grey accents for this pattern.  To fill out the 6PAC I want to make a button front blouse with some blue chambray I bought last year.

Linking up to Patchwork Times for On the Needles Friday!

Jul 28, 2015

New Foot Collection

Just after Easter, I got a new sewing machine.  It is a Brother combination sewing/embroidery machine.  Here is the link for it on Amazon.

Last week I ordered a set of 32 generic presser feet to fit my new machine.

I was counting on being able to use the map pictured above to tell what the different feet were.  I was not counting on the map being labelled in Chinese!  I spent an evening recently googling the feet names from the original Amazon listing, and putting names to feet, then finding videos to show how to use the feet.

I really want to try out most of these feet, and hopefully talk about them some on the blog.

The first foot I tried was the quarter inch foot.  I am working on a baby quilt, so I really needed a quarter inch seam for piecing.  The foot is pictured below:

As you can see, there is just the one small hole in the center, so it can only be used with a straight stitch.  It must be a centered straight stitch, too, which on my machine means moving the needle from the far left default position.


I sewed a sample, the first row was with the width set at 3.5, which moved the needle over too far and the seam was too narrow.  Setting the width to 3.0 worked perfectly!


I feel like the foot made it super easy to get a perfect quarter inch seam.  The large area of the foot held the pieces firmly so that there was not any wiggle as I sewed.  I sometimes veer a bit to one side or the other, and I did not have this problem.  I sewed the entire first set of seams for the baby quilt quickly.


I can't wait to see what else I can do with these feet!

Jun 16, 2015

Butterick 5222 Pants

Way back when I was finishing up my SWAP sewing at the end of April, I decided to sew a new to me pattern on the last sewing day!  I had some time ago bought Butterick 5222, which is a Connie Crawford pattern up to 6x. I had a piece of a grey mystery fabric from our trip to the Goodville Fabric Outlet.

My hip measurement put me into a size 4x.  My waist is bigger, but I measured the pattern paper and it seemed like the waist would fit ok.  I added an inch to the crotch length front and back.  I added many inches to the leg length.  I sewed up this version without the pockets, because I wanted to be able to easily alter the side seams.

They started out huge! This photo is after much fabric has been removed from the side seams!  Also, they are way too long in the crotch.  I cut off part of my waist darts as well as the fly in order to lower the waistband some.  They are reasonable wearable, definitely not brag worthy.

I made version 2 last week, as part of my entry into the Pattern Review Plus Size contest.  I used a brown cotton twill from JoAnn's.  I took all of the length I had added to the crotch back out.  I also folded out about an inch down the center of both the front and back pattern pieces.  (This meant I had to redraw one of the darts on the front piece.) I made them capri length.

I planned to add the pockets, so I basted this pair together.  What I discovered was that because the waist was hitting closer to my actual waist, where I am bigger, I had removed too much ease.  To make sure the capris fit at the waist, I added a gusset to each of the side front pieces, tapering to nothing at the hip.  This supplied the ease I needed, and as an added bonus, looked a bit like a design feature associated with the pockets!

On both the first and second versions, I made an elasticized waistband as explained in Pants for Real People.  I finished all of the exposed seams with my sewing machine's overcast stitch.

I think this version turned out much better!

For my next attempt, I will add back the waist ease, but taper to nothing by the hips, and keep the leg ease folded out.

For the contest I also made a pink and cream textured striped knit boat neck top, using my PMB pattern.  I also made a hairband to match!

Jun 10, 2015

SWAP Pattern Roundup- Scoop Neck Top

Once I solved my shoulder and sleeve issues, I was excited to try a different neckline in the Wild Ginger software.   I decided to go for a scoop neck tee.  I made my first version in some black bamboo knit, which Fabric.com sent me to apologize for the huge numbers painted onto my Pearl Jacket fabric.  This fabric was thinner than I imagined, so I feel like this top needs to be a layering piece.


The scoop neck was a little deeper than I like, and my slip is showing.  It is comfortable though, and I think that I will wear it.

Then I made a version in some teal cotton jersey knit.  I love this one, and I am even going to make a skirt to go with it for the summer.  I made the scoop a bit more shallow, and also made the neck binding a little skinnier.


Jun 9, 2015

SWAP Pattern Roundup- Boat Neck Tops

I mentioned in a few previous posts that I purchased Wild Ginger PatternMaster Boutique Software (PMB).  I decided to try to use the software to try to generate some top patterns for SWAP.  I will add a disclaimer at this point- the instructions tell you that the first thing you are to do is make two fitting garments- pants and a dress.  I have yet to make these garments.  So I really am not complaining about the fact that I am finding all the "tweaks" that I need the hard way.  I also could have saved myself some trouble by comparing the patterns I generated to the tshirt pattern I had been using.

So the first shirt pattern I generated was a sweetheart neckline tee.  I chose the "tshirt" option under type of blouse.  This turned out to be a problem.  To me it seems that tshirt in this software means huge amounts of ease.  Essentially I took about 4 inches out of each side by resewing the entire underarm seam from the hem of the sleeve to the hem of the shirt.  I ended up with a wearable shirt, but I just tossed the pattern afterwards. (and the neckline is slightly wide, I think I will add some loops to keep my bra straps from showing!)

At that point I decided that I would try a boat neck top.  I had some nice pink cotton jersey from Stylish Fabrics.  This shirt had some major issues.  The sleeve cap seemed way too high, and the shoulder seems were very narrow.  I definitely have broad shoulders, and I needed to correct for that.  So I regenerated the pattern with wider shoulder seams, and took out some of the height in the sleeve cap.  I had enough fabric to make part of the shirt, so what I did was cut off the bottom of the old shirt, remake the shirt from the unused fabric, but only to just below the bust.  Then I sewed the new top piece to the old bottom, and topstitched with my twin needle.  (This top was my first time using twin needles!)

Once I had the pattern worked out, I made another version, in this floral knit from the Goodville Fabric outlet.  When I bought it I thought it was grey, now I am pretty sure it is more blue.  Anyway, I have no idea what this stuff is, but the top fits great and feels wonderful.


SWAP Pattern Roundup- 6 Gore Skirt

My return to sewing for myself started back in 2013, when I went to Catherine's (plus size clothing store) with a coupon they had sent me, hoping to find a dress or skirt to wear to my son's graduation.  There was really nothing there for me to buy- there was one skirt in my size, and it was orange and mermaidy.  The dresses were all sleeveless and oddly embellished.

So I came home downtrodden, but resolved to make something to wear.  I found a gored skirt tutorial on Rhonda Buss' blog.  It worked fabulously! I have made 4 different versions- wovens, knits, with and without pockets, attached waistbands and zippers.

My SWAP version was a simple elastic waist, pocketless version out of black cotton jersey knit.  I had originally intended to add beading at the hem, Alabama Chanin style.  Time constraints and hand pain led me to just leave the skirt plain for now.  I might add the beading later.  For now I am enjoying wearing it with summer tops for a secret pajama-like effect. (I'm not wearing the tights this summer!)


Jun 7, 2015

SWAP Pattern Roundup- Self Drafted Elastic Waist Pants

Some time ago, I bought a special fitting issue of Threads magazine, because I heard about it and that there was a great article about sleeves.  I was having horrible sleeve issues, and this issue did help a ton.  Another article in this issue was about how to draft perfect fitting pants.  So I drafted this pattern way back then, and sewed some pants out of some black mystery cotton knit from JoAnns.  Those pants fit pretty well and were comfortable, but they died when I got caught on the corner of a freezer in the supermarket and ripped the crap out of them (like my undies were showing all over the store!)

I followed that with a pair of heavy cotton jersey pants.  Those fit ok, but they cling in all the wrong places.  Since that time I have been searching for a good knit to use for pants.  Just before SWAP, I ordered a piece of heavy rayon ponte knit.  Once I decided that I needed to simplify my SWAP plans, I decided to make the TNT knit pants pattern out of the ponte knit.

The first time I wore them out of the house, I was far from home, and luckily I was with relatives and I could joke about my "experimental pants".  These suckers seemed to grow more and more as the day went on, plus the elastic at the waist was not quite tight enough.  Once we got home, I wash and dried them, then took off the elastic, took in the sides at least 2 inches each and put in a shorter piece of elastic.  I have been wearing them since and things seem to be ok now.


I can't decide if I should take them in even more.  I don't want them too tight across the hips, and I don't want the legs to be too tapered.

Jun 3, 2015

SWAP Pattern Roundup - The Sewing Workshop Pearl Jacket

I blogged some time ago about my wearable muslin of this pattern here.  I loved the fit of it, and got a remarkable amount of wear out of it.  My SWAP included two versions of this jacket.

First, was a regular version to be made from sweatshirt fleece- black on one side burgundy on the other.  As I was sewing the pieces of this jacket together, I noticed that I had missed seeing that there was a number painted on the fabric.  It was right on the back by the armhole!


I asked around on the internet for advice on what to do about this, and someone cleverly suggested that cut a yoke on the back and flip the numbers to the inside.  So that is what I did, plus I cuffed the sleeves to the outside too and hemmed the casing at the collar to the outside.  I hoped doing it in multiple places would make it look intentional.  I love how this jacket turned out, and wore the heck out of it this cold winter!


I added the button to copy this jacket I had seen on Nordstrom's website.

The SWAP guidelines included that we had to make either a reversible item or one from repurposed materials.  I decided that I would make a vest version of the Pearl Jacket, and make it with black and grey jersey, sewn so as to be reversible.  My original plan included doing reverse applique on the grey side, but I have not done that yet. I think it will be really cute for layering in the Fall!


May 25, 2015

SWAP Pattern Roundup - Lekala 5652 Raglan Sleeved Top

I made the Raglan top, Lekala 5652 as the first top I made for SWAP.  As soon as I started taping the pattern pieces together, I had that old sinking feeling "this is going to be too short".  Since I am over 6 ft tall, I am well used to that feeling.  But this was REALLY short.  Like my bra would probably have been hanging out the bottom.

I probably should have abandoned ship at that point, but I am a stubborn soul, plus I did not have another raglan pattern to use.  So I just started slicing the pattern and spreading to get the measurements I needed.  I also needed to add width pretty much everywhere, too.  I guess the pattern was actually for a skin tight crop top raglan!


  Tada!  I can wear it at least, and in fact am wearing it right this moment.  I do not think I will make it again though. Maybe just as pajamas.   Also I am not entirely sure  I have not reversed it front to back.  I might try wearing it backwards before I put it back in the wash.

The struggles with this top were what led me to buy the Wild Ginger pattern software, and I am at least happy for that.

May 19, 2015

SWAP Pattern Roundup- Butterick 5049

Because I have such issues getting photos, I don't get my sewn items up on this blog.  I am going to try to be better about that going forward, but for now I will be blogging about the things I have made in the past.

First, Butterick 5049, which is a Connie Crawford dress pattern.  This pattern has a clever feature, which involves an alternative sleeve pattern for larger biceps.  I knew for sure I wanted to use this!  When you use the alternate sleeve, you also replace the bodice part of the dress so that the armholes will match the sleeve.

I first made this dress in a black/brown printed mystery fabric.  I wanted a new dress for my niece's wedding, and hoped this would be a wearable muslin. Hopefully this picture will give you some idea of the print.  The fabric was most definitely a polyester of some sort.

I did french seams throughout.  I used self bias to finish the neckline, and some mystery vintage binding from a yard sale to hem the sleeves.  (This turned out to be a mistake, I think this trim shrunk upon washing.) The dress was indeed wearable.  It was slightly tight across the back, so my arm did not move comfortably. I wore it with my first Pearl Jacket, and I thought it looked great together.   I did not get a photo of me in the dress.  Even though I had prewashed the fabric, it seems like it gets smaller with each washing.  Also, where it is tight in the back, the seams are tearing.

On to the "good" version.  I did the broad back adjustment as noted in Fit for Real People.  I ordered some wonderful rayon challis from Vogue Fabrics.  Once again I did french seams thoughout, and this time I finished the armhole seams with SnugHug.  I used some lovely lace trim for the hems on the dress and the sleeves.

I wore this version of the dress on Easter, and I love the fit and I think it will be a great summer dress! ( I won't wear the tights, they were necessary on chilly Easter though!  I have a new pair of light brown cute shoes I will wear them with now that the weather is warm.


I have another piece of rayon challis, and I am thinking about using the top part of this dress, but then doing a gathered skirt instead.

May 5, 2015

The Story of my SWAP

Once upon a time in December, I decided to sew along with the talented people on Artisan Square who were planning for SWAP. SWAP stands for sewing with a plan, and the guidelines called for sewing a collection of 5 tops, 3 bottoms and 3 wild cards that would all coordinate. The timeline for sewing was the day after Christmas through April 30.

 SWAP might mean sewing with a plan, but my plan definitely evolved along the way. Way back in December when I started dreaming about my collection, I was picturing outfits that would include my hand knitted accessories and one of my wild card items was a cozy sweatshirt fleece jacket. My original plan included a number of different patterns, none of which I had yet tested, and many of which involved techniques I had not used in decades. I did not originally give much thought to what sorts of things I actually wear, and was more into the challenge of sewing different items.
At some point along the way, as I was fighting to get even the simplest patterns to fit me reasonably (wearable, not necessarily impressive!), I had the revelation that 1- this sea of different styles I was intending to sew did not really suit my casual lifestyle and 2- there was no way I would be able to finish if each pattern took me multiple attempts to get a wearable garment. Then I rebooted the plan to include multiples from the same pattern, as well as pulling in tried and true patterns for a few of the bottoms.

 I was still in a bit of a fantasy. I still pictured my finished items how I would wear them with shawls, knit cardigans, etc. I was not thinking about the end date- April 30- and what kind of stuff I would wear in April. I also had originally intended to do some hand embellishment on a few of the items, Alabama Chanin style. I have long admired the work of some others on Artisan Square who sew up beautiful appliqued and beaded creations. I was in denial- I have thumb issues, and while I can do some hand sewing, doing that much on a deadline would leave me with useless hands.

 I was still having fitting issues. For example, I bought a raglan tee pattern from Lekala, which had I sewn it up unaltered would have been a crop top, and skin tight. Definitely not a good look for me! When I asked advice about this pattern, thinking maybe I had entered something wrong in the website, I heard that someone else had the same issue with that pattern. This person recommended Wild Ginger Patternmaster Boutique software to me. In mid March, with only one shirt of the 5 I need for SWAP sewn, I bought Wild Ginger PMB. To say there is a learning curve is an understatement. It will for the most part draft for my body, but every measurement I try to enter evokes a warning message, as if there is no way a human form has these measurements! There are some defaults that I needed to figure out by trial and error (shoulder length I am looking at you). One of my SWAP tops has some decorative seaming, and that is because I had to remake the entire top half to get the shoulders to be as broad as mine.
I managed to find the right defaults in Wild Ginger PMB to make some knit tops that I am thrilled with. I made 2 boat neck tops and 2 scoop neck tees, and these patterns are destined to be TNTs. Then it was April 29, and I had 10 items sewn. The rules allowed for using a previously sewn item. But I had a Butterick pattern for trousers (B5222) that I wanted to attempt, and I went for it. They are wearable in my opinion, and I will be digging deep into my copy of Pants for Real People.

    So here is what I learned from SWAP:
 1- Sew for the life you lead, not the dreamy one you lead in your head.

2- Don’t bite off more than you can chew. If you are currently sewing knit tees all from the same pattern and 8 gore elastic waist skirts, don’t plan a collection with 8 different patterns and hand beaded details.

 3- Consider the season you will be in when the collection is completed. I should have sewn for Summer. Some of the items can really work for all seasons for me, but I will not be wearing the vest or the jacket until Fall now.

 4- I should have been taking some photos as I went along. This could have allowed me to be blogging stuff all along, but also I nearly had heat stroke doing my photo sessions.

5- I did some new to me stuff in this process:
 Learned to use Wild Ginger PMB software
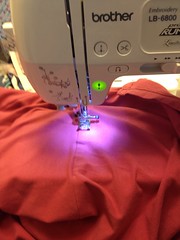
Rigged my phone as a remote for my camera
First twin needle hems
 First woven fabric pants with a fly since about 1979.
Also, as I was sewing up wearable muslins, I managed to salvage every item instead of chucking them in the wadder pile.

 Stay tuned, I will be talking about some of my SWAP outfits in my next few posts.

 Special thanks to Kate at Fabrickated.com for the idea to post SWAP stories.