Showing posts with label SWAP 2015. Show all posts

Jun 16, 2015

Butterick 5222 Pants

Way back when I was finishing up my SWAP sewing at the end of April, I decided to sew a new to me pattern on the last sewing day!  I had some time ago bought Butterick 5222, which is a Connie Crawford pattern up to 6x. I had a piece of a grey mystery fabric from our trip to the Goodville Fabric Outlet.

My hip measurement put me into a size 4x.  My waist is bigger, but I measured the pattern paper and it seemed like the waist would fit ok.  I added an inch to the crotch length front and back.  I added many inches to the leg length.  I sewed up this version without the pockets, because I wanted to be able to easily alter the side seams.

They started out huge! This photo is after much fabric has been removed from the side seams!  Also, they are way too long in the crotch.  I cut off part of my waist darts as well as the fly in order to lower the waistband some.  They are reasonable wearable, definitely not brag worthy.

I made version 2 last week, as part of my entry into the Pattern Review Plus Size contest.  I used a brown cotton twill from JoAnn's.  I took all of the length I had added to the crotch back out.  I also folded out about an inch down the center of both the front and back pattern pieces.  (This meant I had to redraw one of the darts on the front piece.) I made them capri length.

I planned to add the pockets, so I basted this pair together.  What I discovered was that because the waist was hitting closer to my actual waist, where I am bigger, I had removed too much ease.  To make sure the capris fit at the waist, I added a gusset to each of the side front pieces, tapering to nothing at the hip.  This supplied the ease I needed, and as an added bonus, looked a bit like a design feature associated with the pockets!

On both the first and second versions, I made an elasticized waistband as explained in Pants for Real People.  I finished all of the exposed seams with my sewing machine's overcast stitch.

I think this version turned out much better!

For my next attempt, I will add back the waist ease, but taper to nothing by the hips, and keep the leg ease folded out.

For the contest I also made a pink and cream textured striped knit boat neck top, using my PMB pattern.  I also made a hairband to match!

Jun 10, 2015

SWAP Pattern Roundup- Scoop Neck Top

Once I solved my shoulder and sleeve issues, I was excited to try a different neckline in the Wild Ginger software.   I decided to go for a scoop neck tee.  I made my first version in some black bamboo knit, which Fabric.com sent me to apologize for the huge numbers painted onto my Pearl Jacket fabric.  This fabric was thinner than I imagined, so I feel like this top needs to be a layering piece.


The scoop neck was a little deeper than I like, and my slip is showing.  It is comfortable though, and I think that I will wear it.

Then I made a version in some teal cotton jersey knit.  I love this one, and I am even going to make a skirt to go with it for the summer.  I made the scoop a bit more shallow, and also made the neck binding a little skinnier.


Jun 9, 2015

SWAP Pattern Roundup- Boat Neck Tops

I mentioned in a few previous posts that I purchased Wild Ginger PatternMaster Boutique Software (PMB).  I decided to try to use the software to try to generate some top patterns for SWAP.  I will add a disclaimer at this point- the instructions tell you that the first thing you are to do is make two fitting garments- pants and a dress.  I have yet to make these garments.  So I really am not complaining about the fact that I am finding all the "tweaks" that I need the hard way.  I also could have saved myself some trouble by comparing the patterns I generated to the tshirt pattern I had been using.

So the first shirt pattern I generated was a sweetheart neckline tee.  I chose the "tshirt" option under type of blouse.  This turned out to be a problem.  To me it seems that tshirt in this software means huge amounts of ease.  Essentially I took about 4 inches out of each side by resewing the entire underarm seam from the hem of the sleeve to the hem of the shirt.  I ended up with a wearable shirt, but I just tossed the pattern afterwards. (and the neckline is slightly wide, I think I will add some loops to keep my bra straps from showing!)

At that point I decided that I would try a boat neck top.  I had some nice pink cotton jersey from Stylish Fabrics.  This shirt had some major issues.  The sleeve cap seemed way too high, and the shoulder seems were very narrow.  I definitely have broad shoulders, and I needed to correct for that.  So I regenerated the pattern with wider shoulder seams, and took out some of the height in the sleeve cap.  I had enough fabric to make part of the shirt, so what I did was cut off the bottom of the old shirt, remake the shirt from the unused fabric, but only to just below the bust.  Then I sewed the new top piece to the old bottom, and topstitched with my twin needle.  (This top was my first time using twin needles!)

Once I had the pattern worked out, I made another version, in this floral knit from the Goodville Fabric outlet.  When I bought it I thought it was grey, now I am pretty sure it is more blue.  Anyway, I have no idea what this stuff is, but the top fits great and feels wonderful.


SWAP Pattern Roundup- 6 Gore Skirt

My return to sewing for myself started back in 2013, when I went to Catherine's (plus size clothing store) with a coupon they had sent me, hoping to find a dress or skirt to wear to my son's graduation.  There was really nothing there for me to buy- there was one skirt in my size, and it was orange and mermaidy.  The dresses were all sleeveless and oddly embellished.

So I came home downtrodden, but resolved to make something to wear.  I found a gored skirt tutorial on Rhonda Buss' blog.  It worked fabulously! I have made 4 different versions- wovens, knits, with and without pockets, attached waistbands and zippers.

My SWAP version was a simple elastic waist, pocketless version out of black cotton jersey knit.  I had originally intended to add beading at the hem, Alabama Chanin style.  Time constraints and hand pain led me to just leave the skirt plain for now.  I might add the beading later.  For now I am enjoying wearing it with summer tops for a secret pajama-like effect. (I'm not wearing the tights this summer!)


Jun 7, 2015

SWAP Pattern Roundup- Self Drafted Elastic Waist Pants

Some time ago, I bought a special fitting issue of Threads magazine, because I heard about it and that there was a great article about sleeves.  I was having horrible sleeve issues, and this issue did help a ton.  Another article in this issue was about how to draft perfect fitting pants.  So I drafted this pattern way back then, and sewed some pants out of some black mystery cotton knit from JoAnns.  Those pants fit pretty well and were comfortable, but they died when I got caught on the corner of a freezer in the supermarket and ripped the crap out of them (like my undies were showing all over the store!)

I followed that with a pair of heavy cotton jersey pants.  Those fit ok, but they cling in all the wrong places.  Since that time I have been searching for a good knit to use for pants.  Just before SWAP, I ordered a piece of heavy rayon ponte knit.  Once I decided that I needed to simplify my SWAP plans, I decided to make the TNT knit pants pattern out of the ponte knit.

The first time I wore them out of the house, I was far from home, and luckily I was with relatives and I could joke about my "experimental pants".  These suckers seemed to grow more and more as the day went on, plus the elastic at the waist was not quite tight enough.  Once we got home, I wash and dried them, then took off the elastic, took in the sides at least 2 inches each and put in a shorter piece of elastic.  I have been wearing them since and things seem to be ok now.


I can't decide if I should take them in even more.  I don't want them too tight across the hips, and I don't want the legs to be too tapered.

Jun 3, 2015

SWAP Pattern Roundup - The Sewing Workshop Pearl Jacket

I blogged some time ago about my wearable muslin of this pattern here.  I loved the fit of it, and got a remarkable amount of wear out of it.  My SWAP included two versions of this jacket.

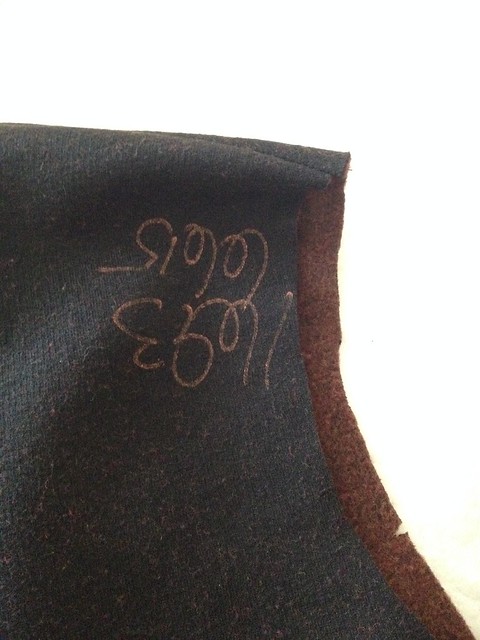
First, was a regular version to be made from sweatshirt fleece- black on one side burgundy on the other.  As I was sewing the pieces of this jacket together, I noticed that I had missed seeing that there was a number painted on the fabric.  It was right on the back by the armhole!


I asked around on the internet for advice on what to do about this, and someone cleverly suggested that cut a yoke on the back and flip the numbers to the inside.  So that is what I did, plus I cuffed the sleeves to the outside too and hemmed the casing at the collar to the outside.  I hoped doing it in multiple places would make it look intentional.  I love how this jacket turned out, and wore the heck out of it this cold winter!


I added the button to copy this jacket I had seen on Nordstrom's website.

The SWAP guidelines included that we had to make either a reversible item or one from repurposed materials.  I decided that I would make a vest version of the Pearl Jacket, and make it with black and grey jersey, sewn so as to be reversible.  My original plan included doing reverse applique on the grey side, but I have not done that yet. I think it will be really cute for layering in the Fall!


May 25, 2015

SWAP Pattern Roundup - Lekala 5652 Raglan Sleeved Top

I made the Raglan top, Lekala 5652 as the first top I made for SWAP.  As soon as I started taping the pattern pieces together, I had that old sinking feeling "this is going to be too short".  Since I am over 6 ft tall, I am well used to that feeling.  But this was REALLY short.  Like my bra would probably have been hanging out the bottom.

I probably should have abandoned ship at that point, but I am a stubborn soul, plus I did not have another raglan pattern to use.  So I just started slicing the pattern and spreading to get the measurements I needed.  I also needed to add width pretty much everywhere, too.  I guess the pattern was actually for a skin tight crop top raglan!


  Tada!  I can wear it at least, and in fact am wearing it right this moment.  I do not think I will make it again though. Maybe just as pajamas.   Also I am not entirely sure  I have not reversed it front to back.  I might try wearing it backwards before I put it back in the wash.

The struggles with this top were what led me to buy the Wild Ginger pattern software, and I am at least happy for that.

May 19, 2015

SWAP Pattern Roundup- Butterick 5049

Because I have such issues getting photos, I don't get my sewn items up on this blog.  I am going to try to be better about that going forward, but for now I will be blogging about the things I have made in the past.

First, Butterick 5049, which is a Connie Crawford dress pattern.  This pattern has a clever feature, which involves an alternative sleeve pattern for larger biceps.  I knew for sure I wanted to use this!  When you use the alternate sleeve, you also replace the bodice part of the dress so that the armholes will match the sleeve.

I first made this dress in a black/brown printed mystery fabric.  I wanted a new dress for my niece's wedding, and hoped this would be a wearable muslin. Hopefully this picture will give you some idea of the print.  The fabric was most definitely a polyester of some sort.

I did french seams throughout.  I used self bias to finish the neckline, and some mystery vintage binding from a yard sale to hem the sleeves.  (This turned out to be a mistake, I think this trim shrunk upon washing.) The dress was indeed wearable.  It was slightly tight across the back, so my arm did not move comfortably. I wore it with my first Pearl Jacket, and I thought it looked great together.   I did not get a photo of me in the dress.  Even though I had prewashed the fabric, it seems like it gets smaller with each washing.  Also, where it is tight in the back, the seams are tearing.

On to the "good" version.  I did the broad back adjustment as noted in Fit for Real People.  I ordered some wonderful rayon challis from Vogue Fabrics.  Once again I did french seams thoughout, and this time I finished the armhole seams with SnugHug.  I used some lovely lace trim for the hems on the dress and the sleeves.

I wore this version of the dress on Easter, and I love the fit and I think it will be a great summer dress! ( I won't wear the tights, they were necessary on chilly Easter though!  I have a new pair of light brown cute shoes I will wear them with now that the weather is warm.


I have another piece of rayon challis, and I am thinking about using the top part of this dress, but then doing a gathered skirt instead.

May 6, 2015

SWAP Photo Op

I have been sewing a good bit, especially with SWAP,  yet hardly any of it makes it here because I don’t take the photos.  I have major issues around getting any selfies!

First, I have bitchy resting face big time. My dad was an avid amateur photographer, he even had a darkroom at some point in the laundry room.  I am sure he gave it up because his inability to get a decent smile out of me for photos made him think he was not good.   Sorry dad, I was not being a brat. I have bitchy resting face! (I think it is hereditary.)


Second, I’ll just put this out there.  I am fat. Wow I said it. Not fat like those sewists that say “oh I am in the zone between misses and plus patterns.” Fat like “oh, I often have to grade up plus patterns to fit me.” I also have to add about 6 inches in length to most things.   The internet is not a safe place to put one’s fat lady selfies.  You get used as before photos.  People comment on the position of your boobs. (Since I sew, I know precisely where mine are thank you, you don’t need to point them out to me. I also know they are uneven, the result of a hack job gall bladder removal that acted like a one sided mini tummy tuck.)  Just try to remember, fat people are real people with very real feelings.

Third, my house is tiny and cluttered.  We are a family of big people in a little townhouse, so really there is not room to get a full view camera angle and not get too much evidence of life around here.  So I pretty much always take my photos in my tiny back yard, where you can see my aging fence, and my electric meter and sometimes a 5 gallon orange bucket from Home Depot.

I needed to get my SWAP photos taken, so I bit the bullet and got to work starting yesterday.  Yesterday, when it was 80+ degrees out.  Suddenly my “cozy” SWAP was causing flop sweats. I would style my hair, and then after a few photos I would have to pull it back in a rubber band to keep if from sticking to my face.  I would iron everything, but my body would steam wrinkles back into them before I could get the photos! I will never again think “ugh why didn’t she iron that?”  I know that there is a chance she did.   I took about half the photos, figuring I would finish this morning. My hair drooped and ended up pulled back before I finished the ironing.   It was not any cooler this morning, plus there were all these giant fuzzy pollen balloons floating around!


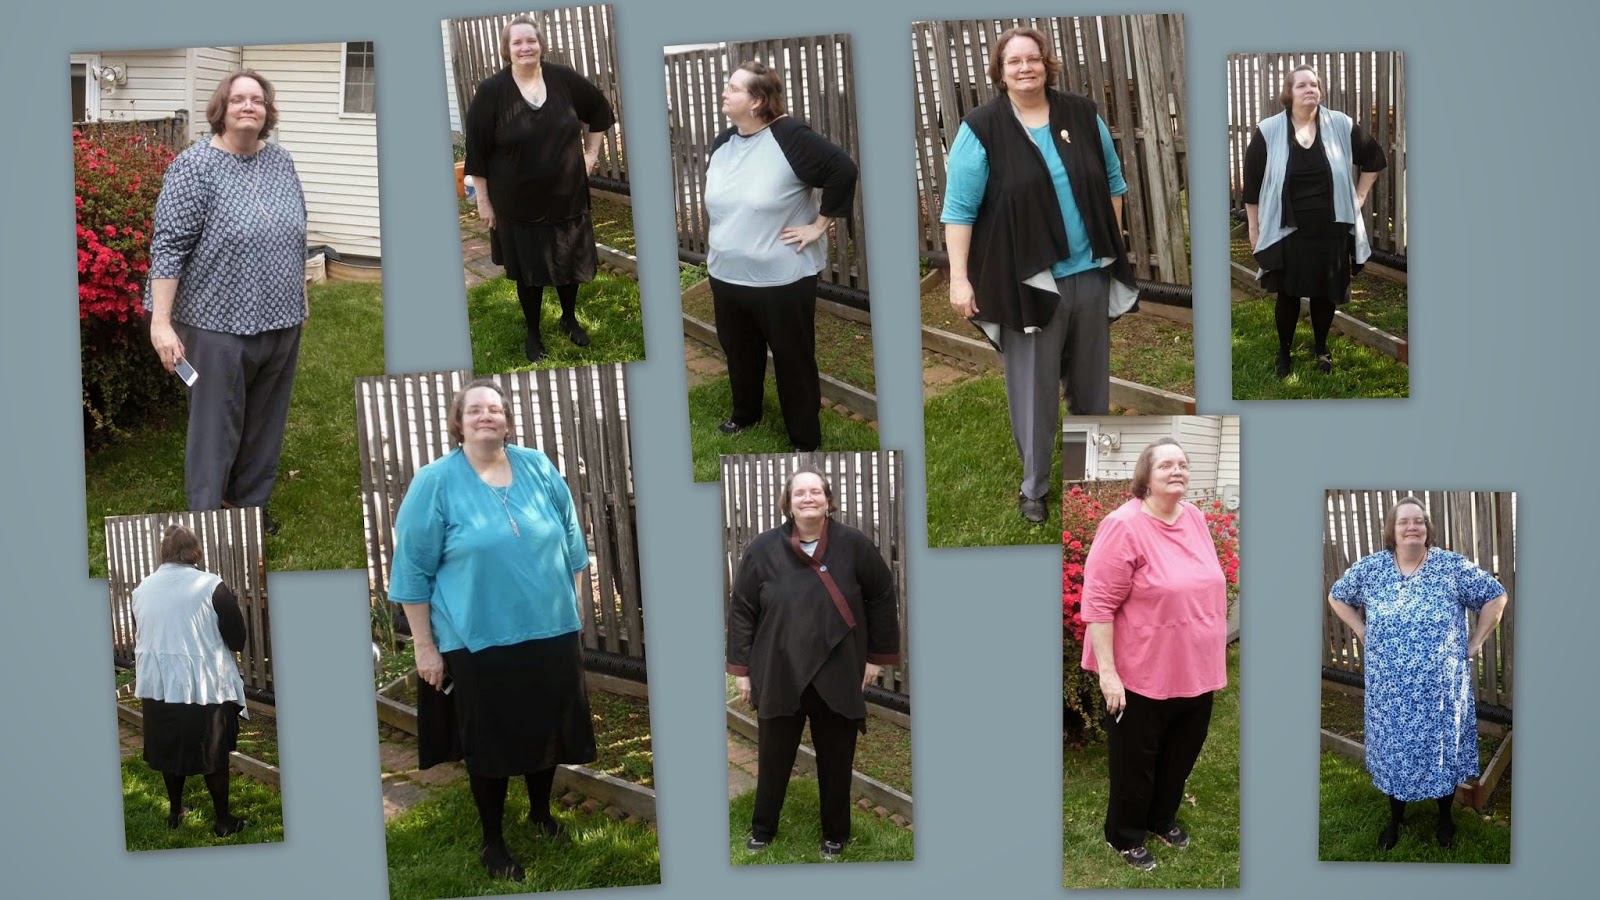
But woohoo! SWAP is done and photographed!  I know I might not get even one vote in the competition- there are some amazing collections posted already, and mine is pretty basic by comparison, but I am thrilled to have worked out some patterns that I can wear and made 11 new pieces for my wardrobe.

May 5, 2015

The Story of my SWAP

Once upon a time in December, I decided to sew along with the talented people on Artisan Square who were planning for SWAP. SWAP stands for sewing with a plan, and the guidelines called for sewing a collection of 5 tops, 3 bottoms and 3 wild cards that would all coordinate. The timeline for sewing was the day after Christmas through April 30.

 SWAP might mean sewing with a plan, but my plan definitely evolved along the way. Way back in December when I started dreaming about my collection, I was picturing outfits that would include my hand knitted accessories and one of my wild card items was a cozy sweatshirt fleece jacket. My original plan included a number of different patterns, none of which I had yet tested, and many of which involved techniques I had not used in decades. I did not originally give much thought to what sorts of things I actually wear, and was more into the challenge of sewing different items.
At some point along the way, as I was fighting to get even the simplest patterns to fit me reasonably (wearable, not necessarily impressive!), I had the revelation that 1- this sea of different styles I was intending to sew did not really suit my casual lifestyle and 2- there was no way I would be able to finish if each pattern took me multiple attempts to get a wearable garment. Then I rebooted the plan to include multiples from the same pattern, as well as pulling in tried and true patterns for a few of the bottoms.

 I was still in a bit of a fantasy. I still pictured my finished items how I would wear them with shawls, knit cardigans, etc. I was not thinking about the end date- April 30- and what kind of stuff I would wear in April. I also had originally intended to do some hand embellishment on a few of the items, Alabama Chanin style. I have long admired the work of some others on Artisan Square who sew up beautiful appliqued and beaded creations. I was in denial- I have thumb issues, and while I can do some hand sewing, doing that much on a deadline would leave me with useless hands.

 I was still having fitting issues. For example, I bought a raglan tee pattern from Lekala, which had I sewn it up unaltered would have been a crop top, and skin tight. Definitely not a good look for me! When I asked advice about this pattern, thinking maybe I had entered something wrong in the website, I heard that someone else had the same issue with that pattern. This person recommended Wild Ginger Patternmaster Boutique software to me. In mid March, with only one shirt of the 5 I need for SWAP sewn, I bought Wild Ginger PMB. To say there is a learning curve is an understatement. It will for the most part draft for my body, but every measurement I try to enter evokes a warning message, as if there is no way a human form has these measurements! There are some defaults that I needed to figure out by trial and error (shoulder length I am looking at you). One of my SWAP tops has some decorative seaming, and that is because I had to remake the entire top half to get the shoulders to be as broad as mine.
I managed to find the right defaults in Wild Ginger PMB to make some knit tops that I am thrilled with. I made 2 boat neck tops and 2 scoop neck tees, and these patterns are destined to be TNTs. Then it was April 29, and I had 10 items sewn. The rules allowed for using a previously sewn item. But I had a Butterick pattern for trousers (B5222) that I wanted to attempt, and I went for it. They are wearable in my opinion, and I will be digging deep into my copy of Pants for Real People.

    So here is what I learned from SWAP:
 1- Sew for the life you lead, not the dreamy one you lead in your head.

2- Don’t bite off more than you can chew. If you are currently sewing knit tees all from the same pattern and 8 gore elastic waist skirts, don’t plan a collection with 8 different patterns and hand beaded details.

 3- Consider the season you will be in when the collection is completed. I should have sewn for Summer. Some of the items can really work for all seasons for me, but I will not be wearing the vest or the jacket until Fall now.

 4- I should have been taking some photos as I went along. This could have allowed me to be blogging stuff all along, but also I nearly had heat stroke doing my photo sessions.

5- I did some new to me stuff in this process:
 Learned to use Wild Ginger PMB software
Rigged my phone as a remote for my camera
First twin needle hems
 First woven fabric pants with a fly since about 1979.
Also, as I was sewing up wearable muslins, I managed to salvage every item instead of chucking them in the wadder pile.

 Stay tuned, I will be talking about some of my SWAP outfits in my next few posts.

 Special thanks to Kate at Fabrickated.com for the idea to post SWAP stories.

Apr 15, 2015

My Head is Spinning

There has been a lot going on here in my "studio"- so much, in fact, that I have not blogged because it was overwhelming to know where to start.  I decided that I would start with a summary post, and then expand on the different topics with individual posts with details and photos.

Wild Ginger Software
For my birthday last month I got software from Wild Ginger called Patternmaster Boutique.  It is software for drafting custom patterns.  I am hoping this will help me avoid the massive amounts of alterations involved when I make a standard pattern.  There is a learning curve involved, and I need to make at least 2 fitting garments to work out what measurements I need to enter to get patterns that fit.


SWAP Sewing Progress
I have made fairly good progress on my SWAP sewing.  I have finished two of the three required bottoms, two of the 5 required tops, and two of the wild cards, including a reversible Pearl vest, so the special garment is done.  I can include one previously sewn item and one ready to wear item, so I might be able to finish in the two weeks I have left.  I haven't blogged any of these completed garments, because I don't have photos.  The photos are always my big stumbling block.

Road Trip with a Fabric Theme
On the Thursday before Easter I happened to see the website for the PA Fabric Outlet, and noticed that they were having a going out of business 70% off sale.  I sent a link to my husband, mostly in a "hey this place is closing and we never got to go there" kind of way.  He responded "Let's go.  I'll take tomorrow off." Yes, he is a keeper!  Anyway, despite the fact that I had recently cataloged all of my fabrics and declared that I do not need any more, we hit Pennsylvania hard and bought a ton of stuff.  We shopped two branches of the PA Fabric Outlet.  An employee at our first PA Fabric Outlet stop suggested we also check out the Goodville Fabric outlet (their sale room is pictured below).  We also stopped at the brick and mortar for Fabric Mart.

There was also a stop for lunch and pie at Park Place Diner.  Hey my husband might be a saint but he is also human!

 New Sewing Machine
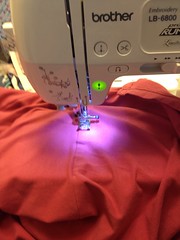
This week I got a new sewing machine.  I got a Brother LB6800PRW Computerized Sewing and Embroidery Machine.  I've only sewn on it for about a day, but I love it so far!

So I will work on collecting my thoughts and some photos for some more detailed posts about some of these topics in the near future.